

Most people who try to brew espresso at home give up after a week. Not because it is genuinely hard, but because nobody told them which three variables actually control the outcome, and they spend weeks chasing problems that a single grind adjustment would fix.
This guide tells you exactly how to brew espresso at home without the guesswork: what equipment you actually need, which espresso coffee beans UK roasters recommend for beginners, how to dial in a shot from scratch, and how to read what your cup is telling you.
Whether you are pulling your first ever shot or trying to rescue a machine that has been making bitter, flat espresso for months, this is the place to start.
Table of Contents
- Quick Takeaways
- What Espresso Actually Is
- Equipment You Actually Need
- Choosing Your Espresso Beans
- The Core Variables: Dose, Grind, Yield, and Time
- Step by Step: Pulling Your First Shot
- How to Read and Fix a Bad Shot
- Espresso Machine Comparison for Beginners
- Frequently Asked Questions
- References
Quick Takeaways
| Key Insight | Explanation |
|---|---|
| Grind size is your primary control dial | Grind finer if your shot runs too fast and tastes sour. Grind coarser if it drags past 35 seconds and tastes bitter. Everything else is secondary until grind is right. |
| Start with a 1:2 ratio | 18g of ground coffee in, 36g of liquid espresso out. This is the most reliable starting point for a balanced, full-bodied shot before you start experimenting. |
| 25 to 30 seconds is your target extraction window | Shots finishing under 20 seconds are typically sour and under-extracted. Shots running past 40 seconds risk bitterness. The SCA standard is 25 to 30 seconds at 9 bar. |
| Freshness matters more than roast label | Espresso beans are generally at their best between five and thirty days after the roast date. Beans roasted too recently over-gas during extraction; stale beans taste flat and dull. |
| Change one variable at a time | If you adjust grind, dose, and tamping pressure simultaneously, you will never know what fixed or broke the shot. Lock everything and change only one thing per session. |
| A burr grinder is not optional | Blade grinders produce particles of wildly varying sizes. Fine particles over-extract; coarse ones under-extract. The result is a shot that tastes both bitter and sour at once. |
| Tamp level, not hard | Consistency and an even surface matter far more than the force you apply. An angled tamp puck causes channeling, where water races through weak spots and extracts unevenly. |
What Espresso Actually Is
Espresso is not a bean, a roast level, or a flavour profile. It is a brewing method. Any coffee can technically be brewed as espresso. What defines it is a specific combination: fine grind, high pressure (around 9 bar), and a short extraction time, producing a concentrated shot of roughly 30 to 40ml from 18g of ground coffee.
That pressure is what makes espresso fundamentally different from every other brew method. At 9 bar, water extracts compounds from coffee significantly faster than gravity brewing and emulsifies coffee oils that paper filters would remove entirely.
The result is a heavier, more syrupy texture and that layer of reddish-brown crema formed by CO2 releasing from the grounds under pressure. This is why espresso has a body that filter coffee simply cannot replicate.
Understanding this from the start saves you from two common beginner mistakes: buying the wrong beans (thinking "espresso roast" is a specific category), and blaming the machine when the real problem is grind size or water temperature.
Equipment You Actually Need
The espresso equipment market is full of expensive distractions. Here is what genuinely matters and what you can skip at the start.
The Essentials
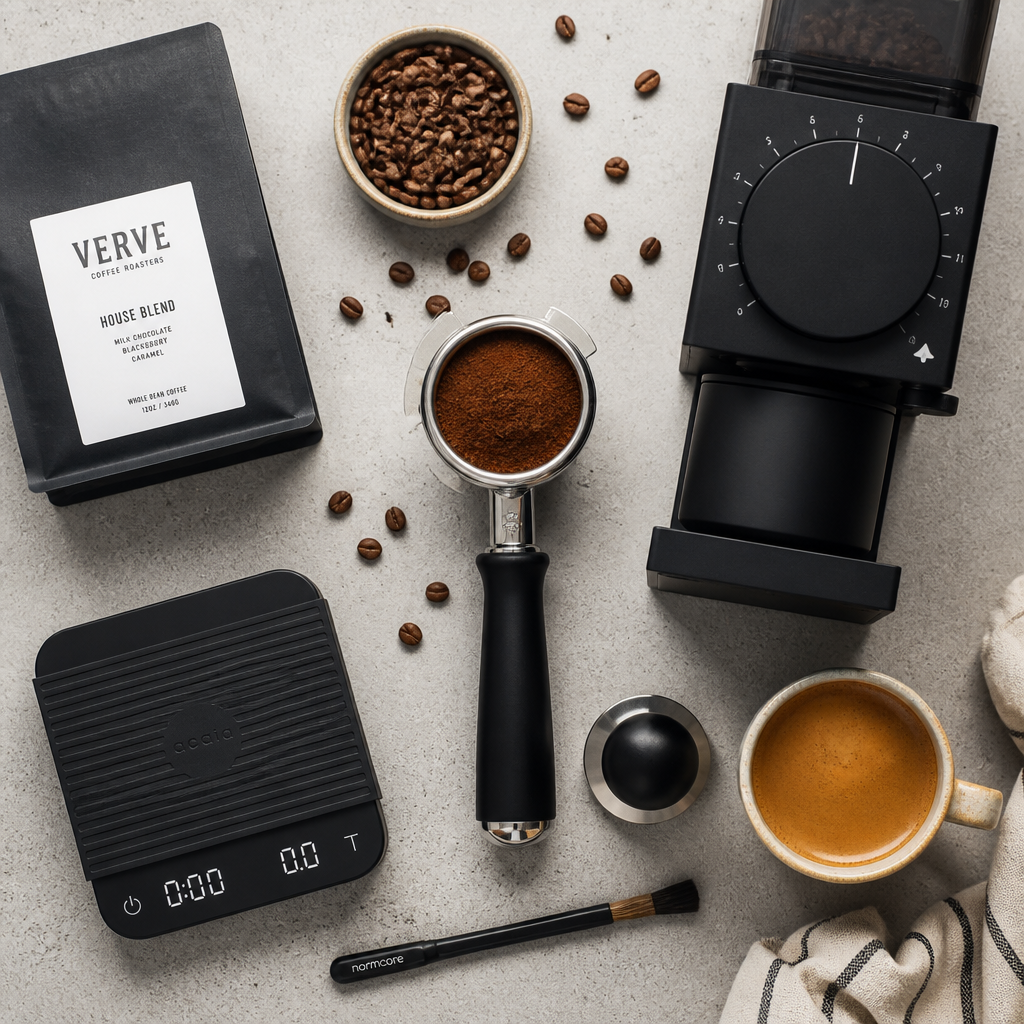
An espresso machine with at least 9 bar of pressure. This is non-negotiable. Lower-pressure machines produce weak, flat shots that no amount of technique will fix. Most entry-level machines marketed as espresso makers hit 9 bar; check the spec before you buy.
A burr grinder is the single most impactful piece of equipment you own. A good burr grinder with average beans consistently outperforms a blade grinder with excellent beans. Burrs produce an even, consistent particle size; blades produce a chaotic mix that makes every shot unpredictable. If you have to choose between spending more on a machine or more on a grinder, spend it on the grinder.
A digital scale accurate to 0.1g removes guesswork from dose and yield. Measuring by eye introduces enough inconsistency to make diagnosing problems nearly impossible. A basic kitchen scale that reads in tenths of a gram costs very little and changes everything.
A timer (your phone works fine) lets you measure extraction time, which is one of your key diagnostic signals.
Filtered water is worth using if you live in a hard water area, which covers a large proportion of England. Hard water can flatten acidity, emphasise bitterness, and make the same espresso blend taste completely different from region to region. Filtration protects your machine's boiler as well as improving cup quality.
Things You Can Add Later
A tamper, a distribution tool, a bottomless portafilter, and a milk jug for steaming are all useful. But none of them will rescue a shot that is off because the grind is wrong. Get your recipe dialled in first, then refine your toolkit.
Pro tip: If your machine came with a pressurised (dual-wall) portafilter basket, swap it for a single-wall basket as soon as you have a decent burr grinder. Pressurised baskets mask grind inconsistencies, which means you cannot read the shot properly and cannot improve systematically.
Choosing Your Espresso Beans
The right espresso coffee beans for a UK home setup are not necessarily the darkest roast or the most expensive bag on the shelf. They are the beans that suit your machine, your water, and your current skill level.
Roast Level
Medium-dark roasts are the most forgiving starting point. They extract within a relatively wide window, produce a stable crema, and deliver the chocolate, caramel, and nutty notes most beginners expect from espresso. Very dark roasts can taste bitter even when technically well-extracted. Very light roasts demand precise temperature control and extended ratios to avoid sourness, making them difficult for beginners.
Blend vs Single Origin
For beginners, a well-designed espresso blend is nearly always the better choice. Blends are formulated for consistency. A single-origin coffee can be expressive and exciting, but it is less forgiving of small variations in grind or temperature. Once you can pull a consistent 25 to 30 second shot, single origins become a genuinely rewarding step up.
Freshness Is the Most Overlooked Factor
For espresso, beans are generally considered to be at their best between five and thirty days after the roast date. In the first few days after roasting, the beans are still off-gassing significant amounts of CO2, which interferes with extraction. Beans beyond thirty days start to taste flat and one-dimensional. Always check the roast date, not the best-before date. A roast date on the bag is one of the clearest signals that a roaster is serious about quality.
Farrer's, the UK's oldest coffee roaster, hand-packs and dispatches freshly roasted coffee from the Lake District, which means beans arrive within the ideal resting window when you order from them. Their espresso blend range includes options from their classic Fairtrade Espresso Blend, with rich caramel notes and soft acidity, through to their dedicated espresso-specific roasts. The Farrer's espresso blend lineup is designed specifically for home machines and gives beginners a reliable, consistent baseline to work from rather than the guesswork of trying to adapt a generic supermarket blend to an espresso setup.
Espresso concentrates whatever is in the bag. A sweet, chocolaty roast becomes a syrupy, caramel shot. A stale or under-roasted bag becomes a sharp, sour one. The beans do not lie.
Pro tip: If you are based in a hard water area in England, choose an espresso blend with slightly higher acidity to compensate. Hard water suppresses perceived acidity, so a blend described as "bright" or "with fruit notes" will land more balanced in the cup than a flat, heavy roast that has nothing for the minerals to work against.
The Core Variables: Dose, Grind, Yield, and Time
Understanding these four variables and how they relate to each other is the difference between someone who can pull a consistent shot and someone who is perpetually guessing. The good news: once this clicks, troubleshooting becomes straightforward.
Dose
Dose is how much ground coffee goes into the portafilter basket. For a double shot, 18g is the standard starting point. Weigh it every time. Guessing introduces variation that makes every other variable harder to read.
Grind Size
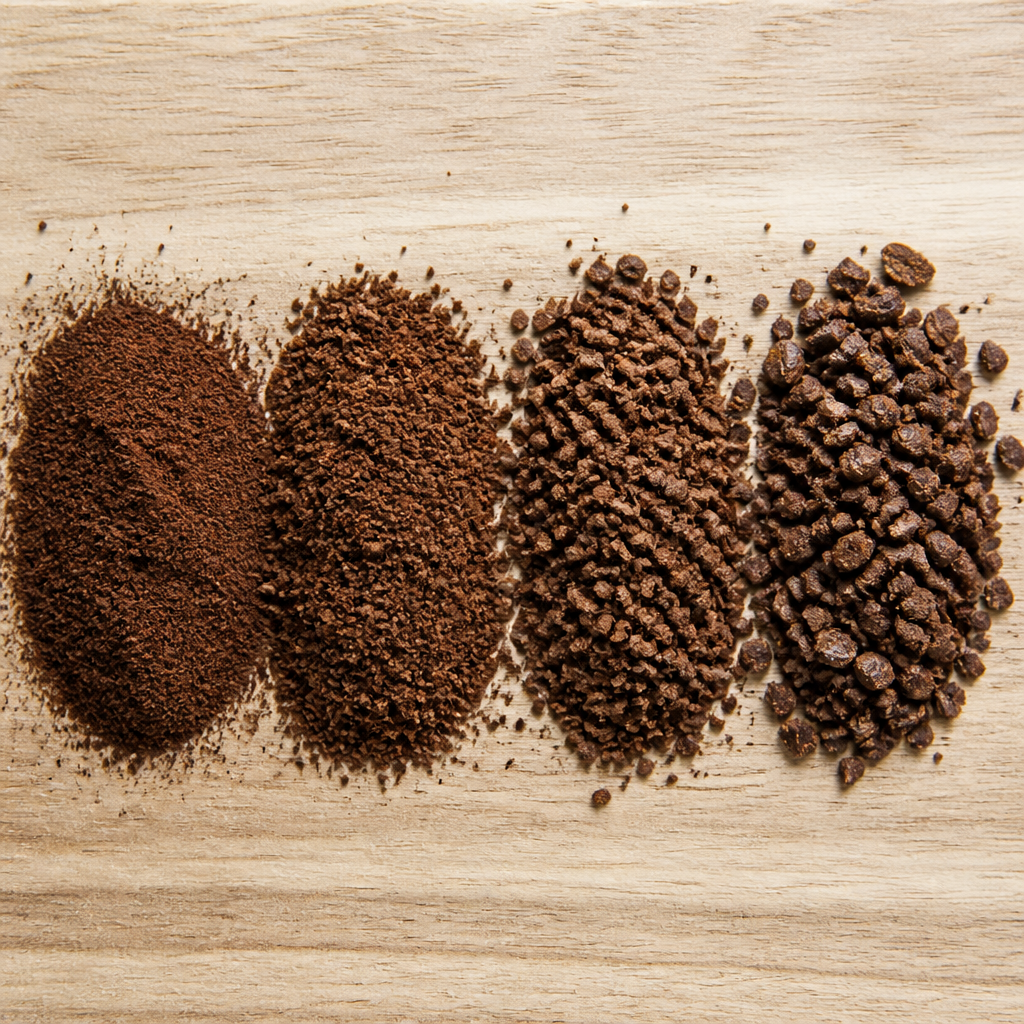
Grind size controls how fast water flows through the puck. Finer particles slow the water down and increase extraction; coarser particles speed it up and reduce extraction. This is your most powerful adjustment. Sour shot? Grind finer. Bitter shot running slow? Grind coarser. Change grind size in small increments, one adjustment per session, and taste each result before moving again.
Yield and Ratio
Yield is how much liquid espresso you collect in the cup. A 1:2 ratio means 18g in and 36g out. This remains the most reliable starting point for balanced, medium-bodied espresso. Once you have the basics consistent, darker roasts often benefit from a slightly shorter ratio (around 1:1.5 to 1:1.8) while lighter roasts can open up at a longer ratio (1:2.5 or 1:3).
Extraction Time
At a 1:2 ratio, a well-extracted shot should run for 25 to 30 seconds. Treat extraction time as a diagnostic output, not an input. You do not set the time; you adjust grind size until the shot hits the right window. A shot finishing under 20 seconds is almost certainly under-extracted and will taste sour. A shot dragging past 40 seconds risks bitterness. Time alone tells you something, but it is the combination of time, taste, and yield that gives you the full picture.
Step by Step: Pulling Your First Shot
This is the sequence to follow every single time, especially at the start. Consistency in process is how you isolate variables and improve.
Preparation
Flush the group head with a brief burst of water before you start. This clears any stale coffee residue and stabilises the temperature of the group head itself, both of which affect extraction. Do not skip this, especially on home machines that can be temperature-inconsistent from a cold start.
Dose and Distribute
Weigh 18g of freshly ground coffee into the portafilter basket. Use your finger or a distribution tool to level the grounds evenly across the basket before tamping. Uneven distribution creates weak spots in the puck where water will find the path of least resistance, causing channeling.
Tamp
Place your tamper flat on the puck and press down with firm, consistent pressure. The goal is a flat, level surface, not a forceful compression. Tamping at an angle is the most common beginner error and it directly causes channeling, producing shots that taste simultaneously sour and bitter because different parts of the puck are extracting at different rates.
Extract
Lock the portafilter into the group head and start brewing immediately. Do not let the grounds sit and heat before water starts flowing. Start your timer. Aim to collect 36g of espresso. When you reach your target yield, stop the shot. The espresso should flow like slow honey, smooth, steady, and dark golden brown. If it gushes like water, the grind is too coarse. If it barely drips or stalls, it is too fine.
Note the time. Taste the shot. Then and only then decide whether to adjust grind size for your next pull.
Pro tip: Do not attempt to fix a shot while it is running. Start fresh with an adjusted grind. Stopping and restarting mid-shot produces inconsistent results that are impossible to diagnose.
How to Read and Fix a Bad Shot
The two most common problems beginners face are under-extraction and over-extraction, and they have clear, identifiable tastes. Learning to read your cup is more useful than any checklist.
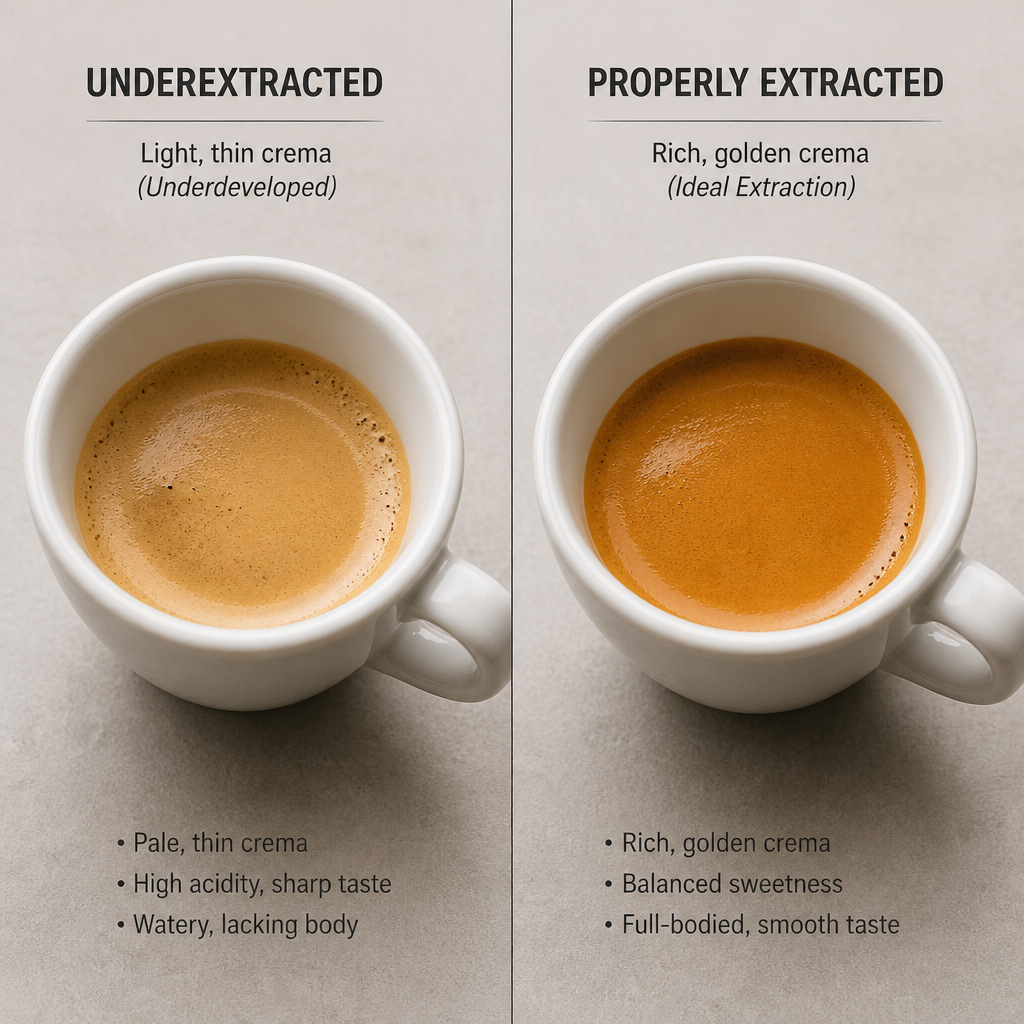
Sour, Sharp, Thin: Under-Extraction
The shot ran fast (under 20 seconds) and the taste is acidic, sharp, or unpleasantly sour, without sweetness or body. The fix is to grind finer. Finer particles slow the water down, increase contact time, and allow more compounds to dissolve. Move your grinder one step finer, pull another shot, and taste again.
Bitter, Dry, Harsh: Over-Extraction
The shot ran slow (over 35 to 40 seconds) and the taste is dry, harsh, or intensely bitter in a way that lingers unpleasantly. The fix is to grind coarser. Reduce contact time and stop pulling bitter compounds from the over-spent puck.
Both Sour and Bitter at Once: Channeling
If your shot tastes both sour and bitter simultaneously, the problem is not grind size. It is channeling. Uneven puck distribution or an angled tamp allows water to race through weak spots, over-extracting those areas and under-extracting others in the same shot. Go back to the preparation step: distribute grounds carefully, check that your tamp is level, and pull again before changing grind.
Espresso Machine Comparison for Beginners
The choice of machine shapes everything about your espresso experience at home. Here is a direct comparison of the three main categories beginners should consider, without brand-specific price claims that change frequently.
| Machine Category | What It Does Well | What It Does Poorly |
|---|---|---|
| Semi-automatic (manual pump, you control yield) | Full control over dose, grind, and yield. Best for learning the craft properly. Wide range of quality options. Works well with any good espresso blend including Farrer's range. | Requires a separate burr grinder. Demands consistency in tamping and technique. Steeper learning curve than the other categories. |
| Bean-to-cup (integrated grinder, automated extraction) | Convenient for daily use. Good for households where multiple people want espresso without dialling in manually. Lower chance of a badly extracted shot from a technique error. | The integrated grinder quality varies widely. Less control over extraction variables. Harder to improve systematically because the machine masks what is happening in the puck. |
| Manual (lever or hand-pump, no electrical pump) | Compact, quiet, and completely independent of electricity for the brewing process. Some manual machines produce exceptional shots with fine-tuned technique. Low running cost. | Requires the most physical consistency. Pressure can vary between shots depending on user technique. Not ideal as a first machine unless you enjoy the process as an end in itself. |
For most UK home espresso beginners, a semi-automatic machine paired with a decent burr grinder gives the best combination of learning opportunity and quality ceiling. Bean-to-cup machines are genuinely excellent for convenience but tend to limit how much you understand and control what is happening, which makes it harder to improve.
Frequently Asked Questions
Do I need a special espresso bean or can I use any coffee?
You can technically pull espresso from any coffee, but beans labelled as espresso blends are roasted and developed specifically for the high-pressure extraction method. They are formulated for balanced extraction at a fine grind and are significantly more forgiving for beginners than using a light filter roast or a supermarket blend that was not designed with espresso in mind. For a UK home setup, a dedicated espresso blend from a roaster like Farrer's gives you a far more reliable starting point than adapting general-purpose beans.
How fine should I grind for espresso?
Fine enough that your shot takes 25 to 30 seconds to reach your target yield at a 1:2 ratio. There is no universal number on a grinder dial because every machine and grinder combination is different. Start fine and adjust coarser if the shot runs too slow or stalls. The only accurate guide is what happens in the cup: sour and fast means grind finer, bitter and slow means grind coarser.
Why does my espresso taste bitter even though I followed the recipe?
Bitterness usually comes from one of three things: over-extraction (grind too fine, shot ran too long), stale beans, or water that is too hot. Check your roast date first. If the beans are fresh, coarsen your grind slightly and see if the shot finishes closer to 25 to 30 seconds. If bitterness persists, check whether your machine's temperature setting (if adjustable) is running above 96 degrees Celsius. Water significantly hotter than that scorches lighter compounds and drives harsh bitterness into the shot.
Do I really need a scale, or can I measure by volume?
You need a scale. Measuring espresso by volume is unreliable because the same volume can represent very different weights depending on crema density and cup temperature. A digital scale accurate to 0.1g takes ten seconds to use and removes one of the biggest sources of shot-to-shot inconsistency. It also lets you repeat a successful recipe exactly, which is the whole point of building a process.
How long do espresso beans stay fresh after opening the bag?
Whole beans stay at their best for two to four weeks after opening, provided you store them in an airtight container away from heat, light, and moisture. Do not store them in the fridge or freezer unless the bag is completely sealed and you are not opening it again for an extended period. Condensation from temperature cycling degrades the beans quickly. Buy in a size that you will use within three to four weeks rather than buying in bulk for the sake of price per gram.
What is channeling and how do I prevent it?
Channeling happens when water finds a weak spot in the coffee puck and races through it rather than flowing evenly across the entire surface. The result is a shot that extracts those areas heavily while leaving the rest under-extracted, producing a cup that tastes both bitter and sour at once. It is caused by uneven distribution of grounds before tamping, or by tamping at an angle rather than straight down. Level your grounds carefully before you tamp, and press your tamper straight down with a flat, even surface. Most channeling problems disappear once distribution and tamp angle are corrected.
Is Farrer's espresso blend suitable for a home espresso machine?
Yes. Farrer's espresso blends are roasted specifically for espresso extraction and are dispatched freshly roasted, meaning they arrive within the ideal five to thirty day resting window for espresso. Their Fairtrade Espresso Blend, with its caramel notes and soft acidity, is a particularly good entry point for beginners because it is forgiving across a range of grind settings and machine types. If you want to explore their full range, their espresso blend collection covers everything from classic dark-roast profiles through to more nuanced medium-roast options suited to modern flat white and latte styles.
If you have just pulled your first dialled-in shot at home or you are still wrestling with a stubborn grinder, we would love to hear how it is going and what bean or machine combination you are working with.
References
- Beginner's technical guide to espresso extraction, pressure, and variables
- Step-by-step home espresso brewing guide covering dose, grind, and dialling in
- Complete guide to espresso extraction time and brew ratio
- Farrer's complete UK guide to espresso roast coffee and bean selection
- Farrer's coffee grind guide: matching grind size to brew method


