

Most people brewing filter coffee at home are making the same handful of mistakes: wrong grind size, water that is too hot or not hot enough, and no attention to the bloom. The result is a cup that tastes flat, bitter, or thin. And yet filter coffee, done correctly, is one of the clearest, most rewarding ways to taste what a great coffee actually has to offer. This step-by-step guide on how to brew filter coffee covers everything from equipment and ratios to grind size and pouring technique, so every cup you make from here on is worth drinking.
Table of Contents
- Quick Takeaways
- What Is Filter Coffee and Why Does It Matter
- Equipment You Actually Need
- Choosing the Right Coffee for Filter Brewing
- Step-by-Step Brew Guide
- Filter Method Comparison
- Common Mistakes and How to Fix Them
- Frequently Asked Questions
- References
Quick Takeaways
| Key Insight | Explanation |
|---|---|
| Water temperature matters more than most people realise | Aim for 93°C to 98°C. Boiling water straight from the kettle is slightly too hot and can scorch lighter roasts, producing bitterness. |
| The bloom step is not optional | Pouring a small amount of water first and waiting 30 seconds releases trapped CO2, which otherwise blocks even extraction. |
| Grind size directly controls flavour balance | Too fine and the coffee tastes bitter and over-extracted. Too coarse and it tastes sour and weak. Medium to medium-coarse is the target for most pour-over methods. |
| Fresh beans make a measurable difference | Coffee ground from freshly roasted whole beans extracts more evenly and produces noticeably more aroma and sweetness than pre-ground. |
| A 1:15 coffee-to-water ratio is the standard starting point | That is roughly 15g of coffee to 225ml of water for a single cup. Adjust slightly to taste once you have the basics right. |
| Pre-rinsing your filter removes papery flavour | Running hot water through the filter before adding coffee washes away the paper taste and warms the brewer at the same time. |
| Filtered water produces a cleaner cup | UK tap water, especially in hard water areas, can dull the flavour of a good coffee. Using filtered water is a simple, high-impact change. |
What Is Filter Coffee and Why Does It Matter
Filter coffee is any method where hot water passes through ground coffee and a filter medium, separating the liquid from the solids. The filter, whether paper or metal, is what defines the character of the cup. Paper filters trap the fine particles and oils that would otherwise make the brew cloudy and heavy, producing the clean, bright taste filter coffee is known for.
This is worth understanding because it shapes every decision you make in the brewing process. You are not forcing water through coffee under pressure, as with espresso. You are relying entirely on gravity, water temperature, grind size, and time to extract the right amount of flavour. When those variables are dialled in, the result is a cup with real clarity, one where you can actually taste the origin character of the beans.
At Farrer's, the coffees that really shine in a filter setting are the ones with defined, clean flavour profiles. A well-sourced single-origin or a carefully balanced filter blend will express qualities, fruity notes, floral aromatics, chocolate undertones, that espresso preparation can sometimes obscure. Filter brewing is the format that shows you what a coffee is actually made of.
Equipment You Actually Need
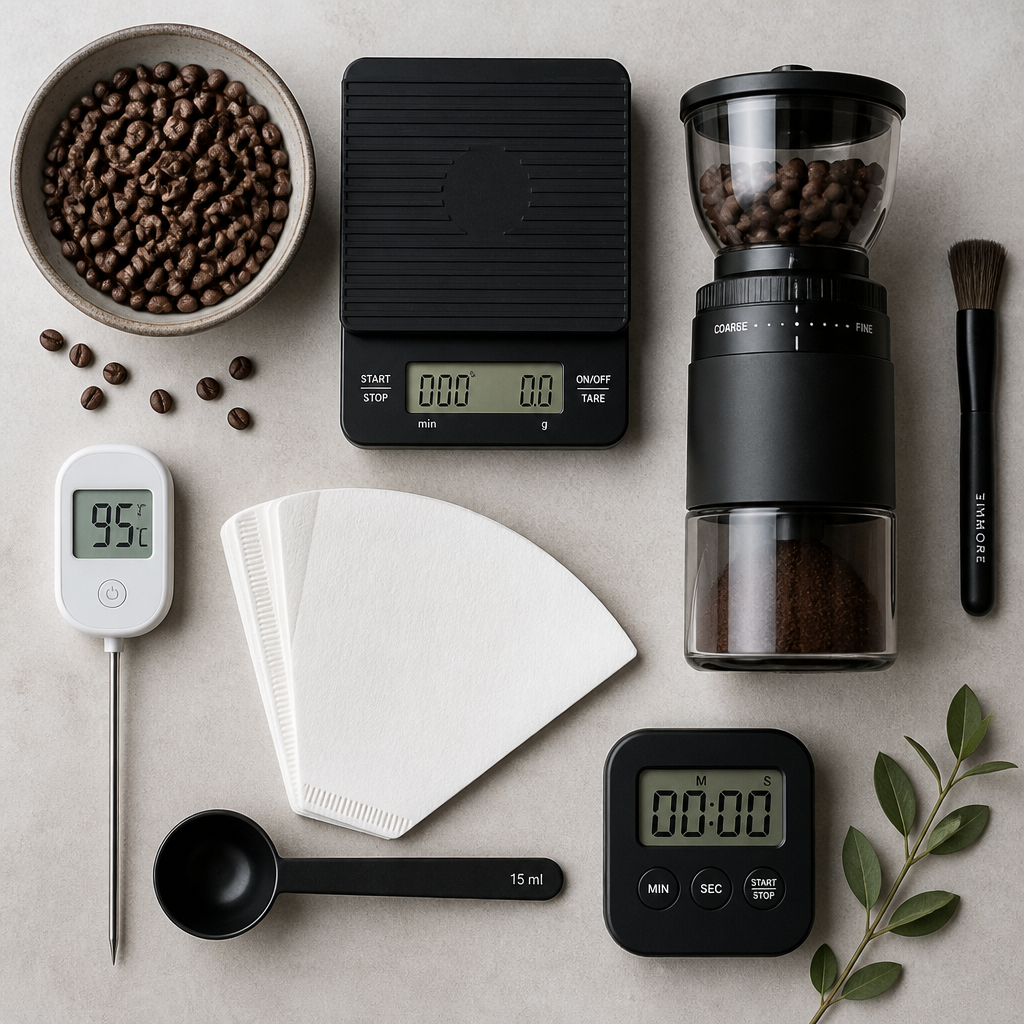
You do not need an expensive setup to brew excellent filter coffee at home. You do need the right tools. Trying to cut corners on grind quality or water control will cost you more in wasted coffee than any equipment investment.
The core kit for pour-over brewing
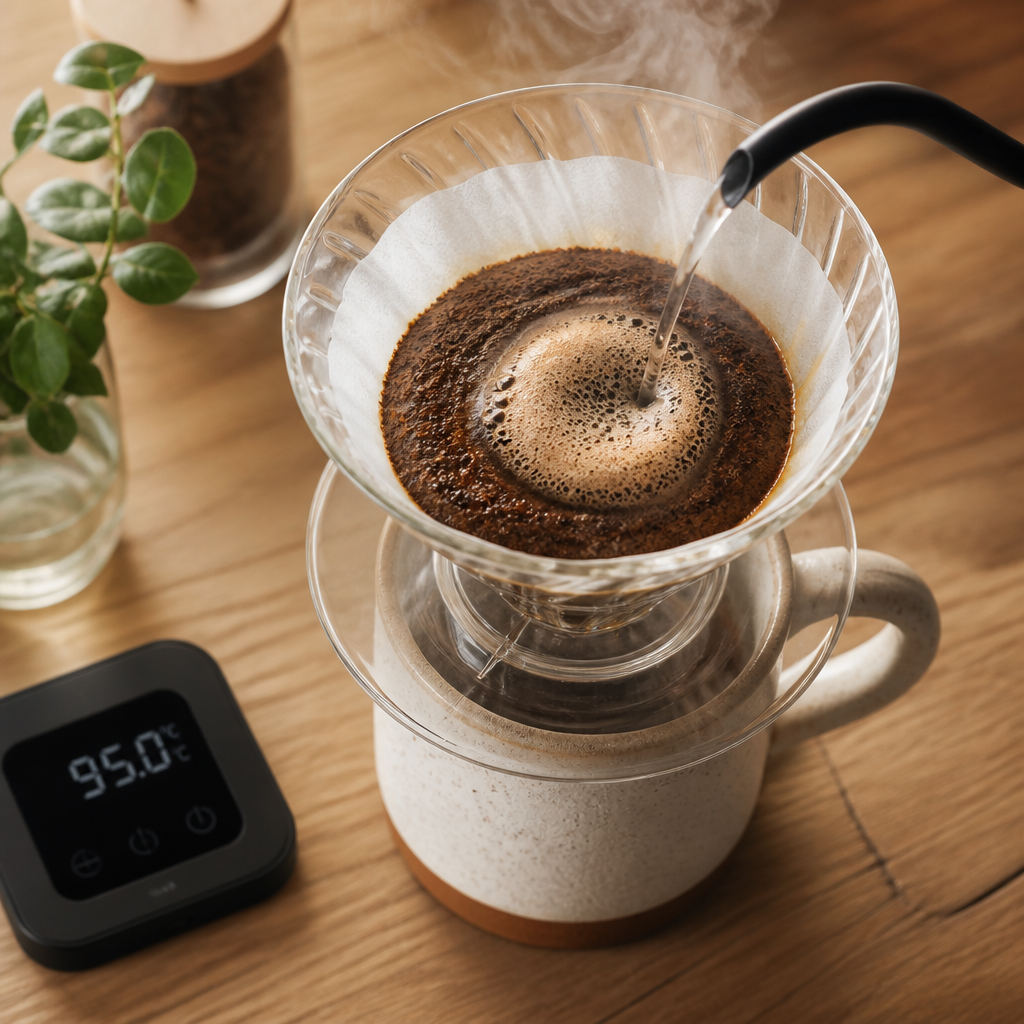
A gooseneck kettle is the single most useful piece of equipment beyond the brewer itself. The long, narrow spout gives you precise control over where and how fast water lands on the coffee bed. A standard kettle pours in a wide, uncontrolled stream that disrupts the grounds unevenly.
For the brewer, the Hario V60, Kalita Wave, and Chemex are the three most widely used pour-over devices. Each produces a slightly different cup. The V60 rewards careful pouring and produces a very clean, tea-like brew. The Kalita Wave is more forgiving and consistent. The Chemex uses a thicker filter and delivers a particularly bright, light-bodied result. Any of them will produce exceptional coffee once you understand the method.
Grinder choice
A burr grinder is non-negotiable if you are serious about filter coffee. Blade grinders chop coffee unevenly, producing a mix of coarse and fine particles that extract at different rates, giving you a cup that is simultaneously over and under-extracted. A burr grinder, even a basic hand grinder, produces a consistent particle size that extracts evenly.
Opt for unbleached paper filters over white bleached ones. Bleached filters can leave a faint chemical taste in the cup, especially noticeable in lighter, more delicate roasts.
Pro tip: A simple kitchen scale costs less than a bag of specialty coffee and transforms your brewing consistency immediately. Measuring by weight rather than scoops removes one of the biggest variables in home brewing.
Choosing the Right Coffee for Filter Brewing
Not every coffee performs equally well in a filter. Lighter and medium roasts are generally the best match for filter brewing because the clean extraction highlights their origin characteristics rather than masking them. Dark roasts can work, but the paper filter removes some of the body that makes a dark roast satisfying, leaving a thinner cup.
Whole bean coffee, freshly roasted, is the starting point. Pre-ground coffee starts losing its volatile aromatic compounds within days of grinding. A freshly roasted whole bean ground immediately before brewing gives you the full picture of what the coffee has to offer.
Farrer's has been roasting coffee in the Lake District for over 200 years, and their range includes blends and single-origins that are specifically suited to filter preparation. If you are new to brewing filter at home, starting with one of their coffee blends designed for filter use removes the guesswork around bean selection and lets you focus on dialling in your technique.
The filter is not just a piece of equipment. It is the reason the cup tastes the way it does. Choose your beans and your filter medium with the same attention you give to everything else in the process.
Pro tip: If you are buying whole beans for filter brewing, look for a roast date on the bag, not just a best-before date. Aim to brew coffee between 7 and 21 days after roasting for the best flavour balance. Coffee roasted earlier than 7 days can be too gassy for an even extraction. Coffee older than 4 to 6 weeks starts to taste flat.
Step-by-Step Brew Guide
This guide uses a pour-over brewer such as the V60 or Kalita Wave. The principles apply to any gravity-fed filter method. The standard ratio is 15g of coffee to 225ml of water for a single cup, scaling proportionally for larger volumes.
Step 1: Heat your water
Bring filtered water to the boil, then allow it to rest for around 30 to 45 seconds. This brings it down to approximately 93°C to 98°C. If you have a temperature-controlled kettle, set it directly to 94°C. Water cooler than 90°C will under-extract and produce a flat, sour cup.
Step 2: Prepare your filter and brewer
Place your paper filter in the brewer and rinse it thoroughly with hot water. Discard the rinse water. This step removes the papery taste from the filter and pre-warms your brewer, which helps maintain a stable temperature during brewing.
Step 3: Grind your coffee
Grind your beans immediately before brewing to a medium-coarse consistency, similar in texture to coarse sea salt. For a finer brewer like the V60, a medium grind works better. The grind size controls how fast water passes through the coffee bed. If your brew runs through in under two minutes, grind finer. If it stalls above four minutes, grind coarser.
Step 4: The bloom pour
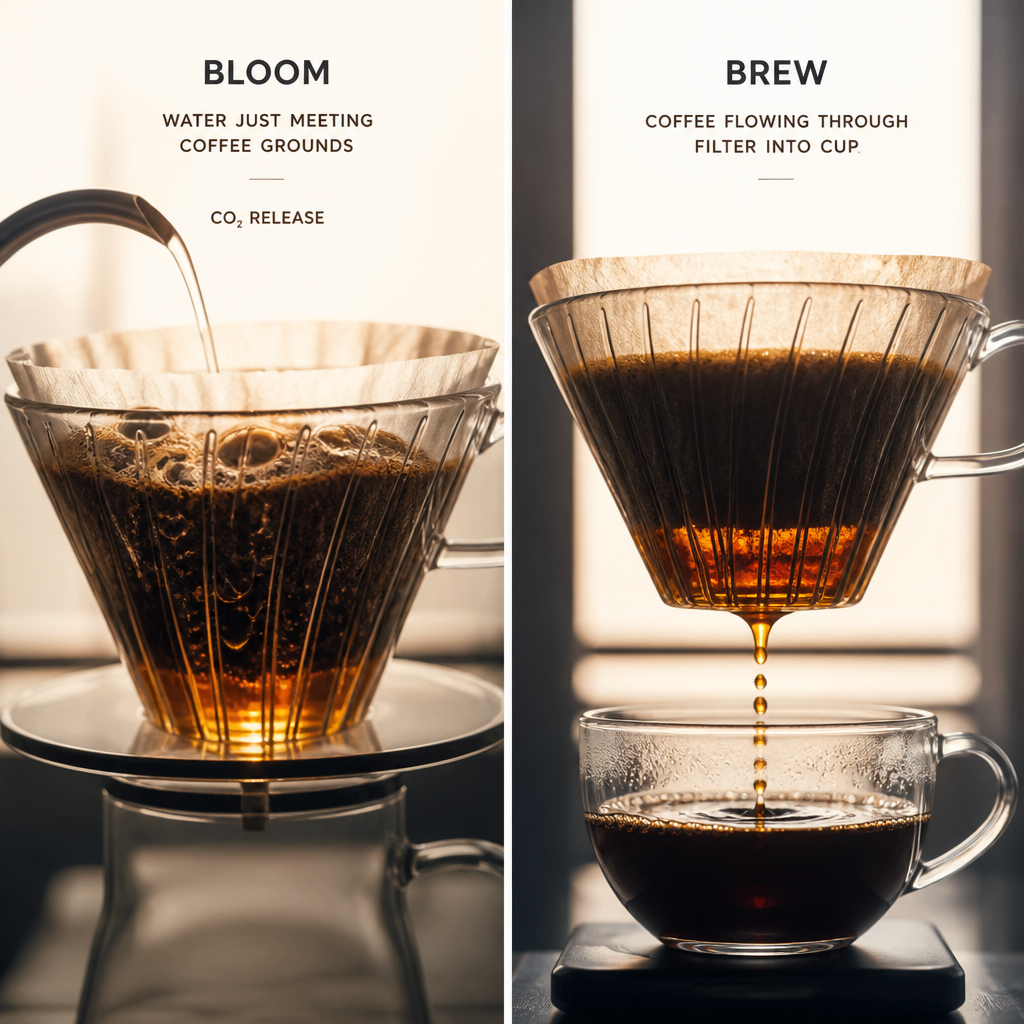
Add your ground coffee to the filter and create a small well in the centre. Pour just enough water to saturate the grounds, roughly twice the weight of the coffee. If you are using 15g of coffee, pour about 30ml of water. Wait 30 to 45 seconds. You will see the coffee bed swell and bubble as CO2 escapes. This is the bloom, and skipping it means uneven extraction in every pour that follows.
Step 5: Main pour
Pour the remaining water slowly and in a controlled, circular motion, starting from the centre and moving outward. Keep the water level in the brewer steady rather than flooding it all at once. The total brew time from first pour to the last drip should be between 3 and 4 minutes.
Step 6: Serve immediately
Filter coffee is at its best within the first 10 to 15 minutes after brewing. Leaving it on a warming plate or in a thermal carafe for extended periods degrades the flavour quickly. Brew what you plan to drink.
Filter Method Comparison
Choosing between filter methods comes down to what kind of cup you want and how much control you are comfortable with. The three methods below cover the range most home brewers will consider.
| Method | Best For | Key Characteristic |
|---|---|---|
| Hario V60 | Experienced home brewers who want precision and clarity | Clean, tea-like body with pronounced aroma. Rewards careful, consistent pouring technique. |
| Kalita Wave | Beginners or anyone who wants a more forgiving brew | Flat-bottomed design produces more even extraction with less technique required. Balanced, reliable cup. |
| Chemex | Those who prioritise a particularly clean, bright cup and enjoy the aesthetic ritual | Thicker filters remove more oils, producing an exceptionally clear, light-bodied brew. Ideal for delicate single-origins. |
In practice, most home brewers start with the Kalita Wave or a basic drip machine and move to the V60 once they want more control. There is no wrong answer here. The method that you will actually use consistently will always produce better results than a more technically demanding method you only attempt occasionally.
Common Mistakes and How to Fix Them
The majority of bad filter coffee can be traced to a small number of repeatable errors. Understanding what is going wrong is the fastest route to fixing it.
Bitter, harsh-tasting coffee
Bitterness is almost always a sign of over-extraction. The most common causes are water that is too hot, a grind that is too fine, or a brew time that runs too long. Start by coarsening your grind by one or two steps and check whether your water temperature is above 98°C. If you are using a V60, also check that you are not pouring too slowly, which keeps the coffee sitting in very hot water for too long.
Sour, thin, or under-developed coffee
A sour or watery cup points to under-extraction. The water has passed through too quickly to pull enough flavour from the grounds. Grind finer, ensure your water is hot enough, and make sure you are completing the bloom step. A grind that is too coarse is the single most common cause of sour filter coffee.
Inconsistency between brews
If your coffee tastes different every time, you are measuring inconsistently or skipping steps. Using a scale for both coffee and water, and timing your brew with a phone timer, removes the two biggest sources of variability instantly. The bloom step and consistent pouring speed handle the rest.
Pro tip: Keep a simple brewing log for the first few weeks. Note your grind setting, dose, water volume, brew time, and a one-sentence tasting note. It sounds tedious but it makes diagnosing problems genuinely easy and gives you a clear record of what works.
Frequently Asked Questions
What is the best coffee-to-water ratio for filter coffee?
The standard starting point is a 1:15 ratio, meaning 1 gram of coffee per 15ml of water. For a single cup, that is roughly 15g of coffee to 225ml of water. If you prefer a stronger cup, move toward 1:13 or 1:14. For something lighter, try 1:16. Adjust from the standard ratio once you have your grind and temperature dialled in.
Does the type of water I use really make a difference?
Yes, and particularly so in the UK where many areas have hard water. High mineral content, especially calcium and magnesium, affects extraction and can make coffee taste flat or chalky. Filtered water, or water with a moderate mineral content, produces a noticeably cleaner, more vibrant cup. It is one of the easiest upgrades you can make without changing any equipment.
Can I use pre-ground coffee for filter brewing?
You can, but the results will be noticeably inferior to grinding fresh. Pre-ground coffee loses its aromatic compounds quickly after grinding. If you must use pre-ground, buy it in small quantities, store it in an airtight container away from light and heat, and use it within two weeks of opening. Choosing a grind size labelled "filter" or "pour-over" will at least give you the right particle size for the method.
How do I know if my grind size is right for filter coffee?
Grind size is correct when your total brew time lands between 3 and 4 minutes for a pour-over. If the water drains through in under 2 minutes, the grind is too coarse. If it takes more than 5 minutes or the water pools on top of the coffee bed, the grind is too fine. Taste is also a direct indicator. Sour equals too coarse, bitter equals too fine.
What is the bloom and why is it important?
The bloom is the initial pour of a small amount of water, roughly twice the weight of your coffee, over the grounds at the start of the brew. Fresh coffee contains CO2 from the roasting process. If you do not release this gas before the main pour, it creates uneven channels through the coffee bed and blocks proper extraction. Skipping the bloom is one of the most common reasons home brews taste inconsistent or underdeveloped.
Is filter coffee different from drip coffee?
Drip coffee is a form of filter coffee. An automatic drip machine brews coffee by the same principle, hot water passing through ground coffee and a paper filter, but removes the manual pouring step. Manual pour-over methods give you more control over water flow, temperature, and timing. Automatic drip machines are more convenient and more consistent for everyday use, especially if you brew multiple cups at once.
How should I store my coffee beans to get the best results from filter brewing?
Store whole beans in an airtight, opaque container at room temperature, away from heat, light, and strong odours. Do not store them in the fridge or freezer unless you are working with a large quantity you will not use for several weeks, and only freeze once. The main enemies of roasted coffee are oxygen, moisture, heat, and light. A valve-sealed bag or a purpose-made coffee canister handles all four.
What is your current filter brewing setup, and what is the one thing you are still trying to fix about your cup? Share your experience in the comments.


